
1. https://console.cloud.google.com/ 에 접속
2.프로젝트 생성
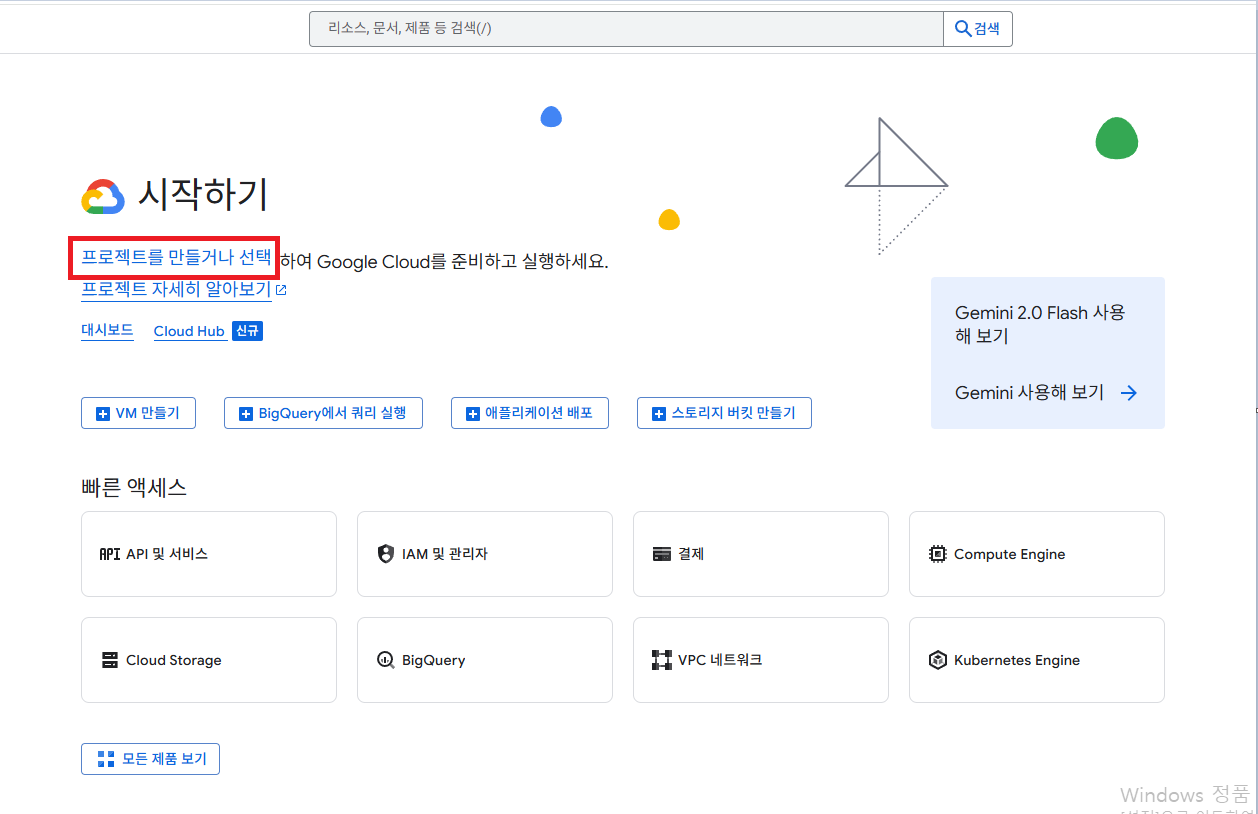
3. 새 프로젝트 선택

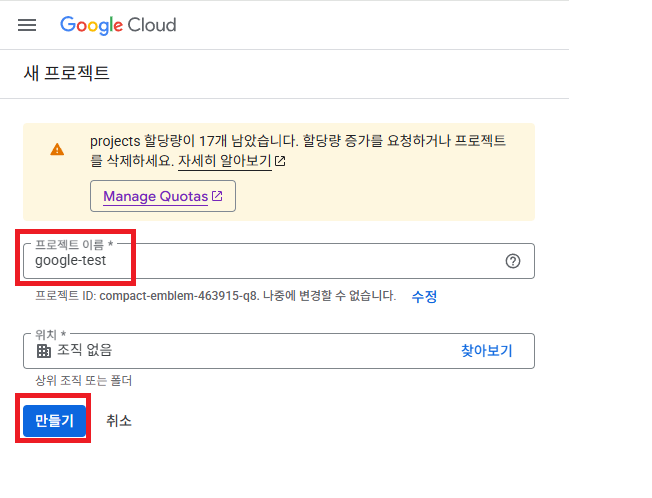
4. 프로젝트 이름 입력 후 만들기
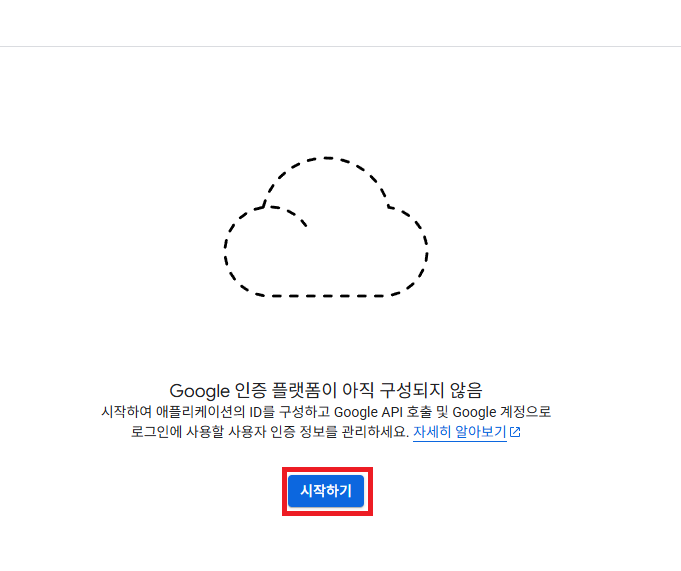
5. OAuth 동의 화면 클릭

6.시작하기 클릭
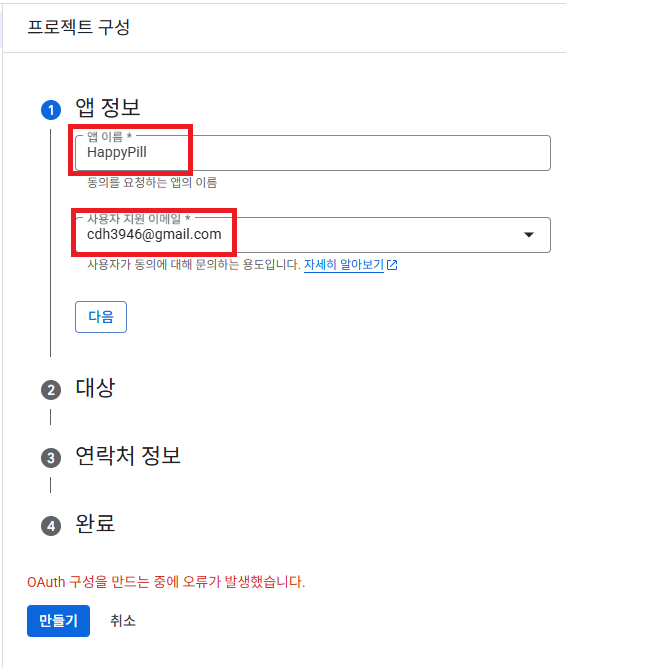
7. 앱 이름과 사용자 지원 이메일 입력 후 다음 버튼
8. 외부 클릭 후 다음 버튼

9. 이메일 주소 입력 후 다음 버튼

10. 동의 클릭 후 만들기 버튼

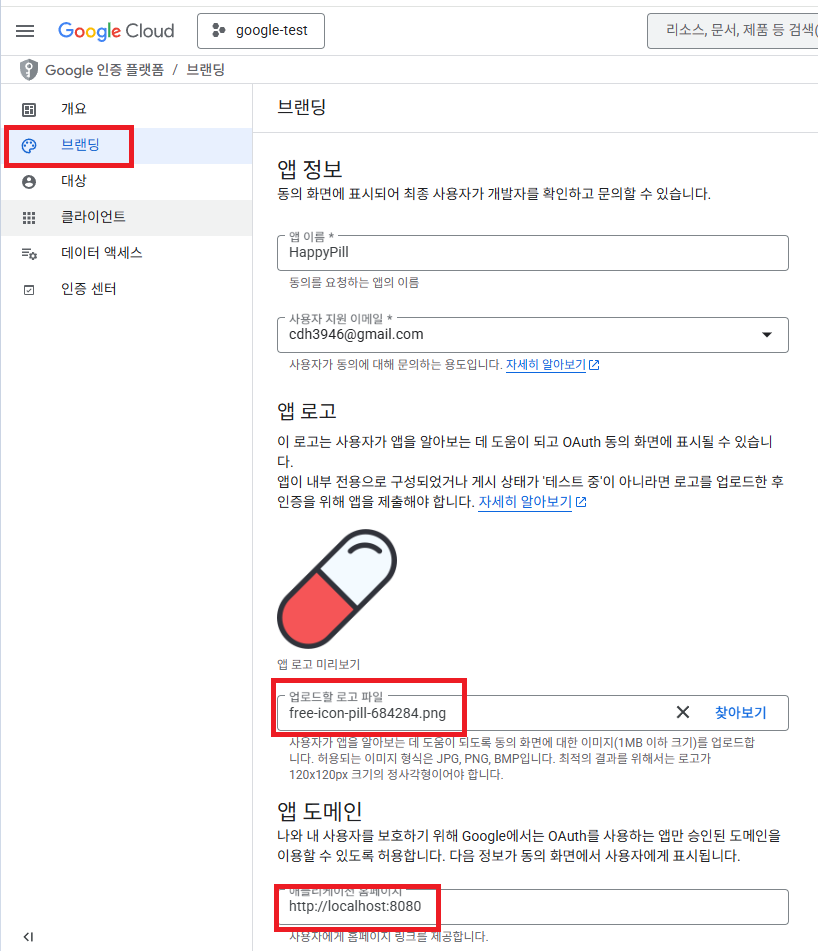
11. 브랜딩 클릭 후 업로드할 로고가 있으면 설정하고 앱 도메인은 프론트측 서버를 입력한다.
13. 데이터 액세스 -> 범위 추가 또는 삭제 -> 원하는 범위 클릭

14. 클라이언트 -> 클라이언트 만들기

15. 웹 어플리케이션 선택 후 이름 입력 후 인가코드가 전달될 리디렉션 URI 입력
보편적으로 /login/oauth2/code/{소셜로그인} 경로가 많이 사용된다고 한다.

16. 이렇게 만들면 클라이언트 ID 와 클라이언트 보안 비밀번호가 나오는데 이걸 application.yml 파일에 입력해줘야한다.

구글의 경우 registration 과 provider 중 provider 부분 등록하지 않아도 스프링측에서 알아서 해결해준다고 한다.
#registration
spring.security.oauth2.client.registration.google.client-name=google
spring.security.oauth2.client.registration.google.client-id=
spring.security.oauth2.client.registration.google.client-secret=
spring.security.oauth2.client.registration.google.redirect-uri=http://localhost:8080/login/oauth2/code/google
spring.security.oauth2.client.registration.google.authorization-grant-type=authorization_code
spring.security.oauth2.client.registration.google.scope=profile,email
'OAuth2.0' 카테고리의 다른 글
| Kakao 소셜 로그인 구현 (3) | 2025.07.07 |
|---|